3-4.ハンズオン#2 data driven IVR
このハンズオンでは、外部のWebサービス(OpenWeather)から取得したデータに基づく、”動的なIVR”を構築してみます。具体的には、顧客が入力した郵便番号をキーにして現在の気象情報を取得し、それを IVR = Amazon Connect の問い合わせフローで再生する、という内容です。これは非常にシンプルなシナリオですが、こうした”動的な IVR”の活用例は以下の様なものが考えられます。
- 顧客の直近の購入履歴に基づいて、ガイダンスの構成やルーティングするキューを変更する
- 顧客の現在の位置情報に基づいて、ガイダンスの構成やルーティングするキューを変更する
- 顧客の居住地の天候に基づいて、ガイダンスの構成やルーティングするキューを変更する etc
この様に、顧客の置かれている背景やこれまでの履歴など、コンテキストに基づいたコールルーティングは、それぞれの顧客に対してパーソナライズされた、最適な体験を提供するために重要な観点と言えます。
ハンズオン #2 data driven IVR
このハンズオンでは、以下のような作業を実施します。
- OpenWeather の Web サービスを利用するための API キーを取得する
- Lambda 関数用の IAM ロール を作成する
- 郵便番号を元に、OpenWeather から気象情報を取得する Lambda 関数を作成する
- Amazon Connect インスタンスに作成した Lambda 関数を登録する
- Amazon Connect の問い合わせフローを作成し、電話番号を紐づける
- テストコール
このハンズオンでは、“1.準備” の章の作業が完了していることを前提にしています。まだ、Amazon Connect インスタンスの作成や電話番号の取得が済んでいない方は、先に “1.準備” の作業を実施してください。
1. OpenWeather の Web サービスを利用するための API キーを取得する
- OpenWeather Web サイトの トップページにアクセスし、右上の“Sign In”を押す。
Create an Accountをクリックする。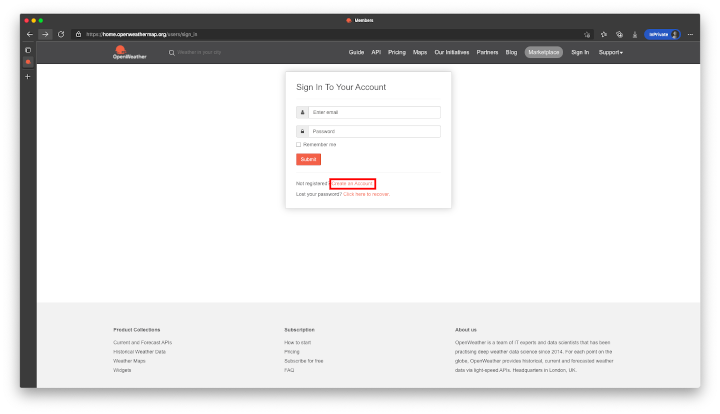
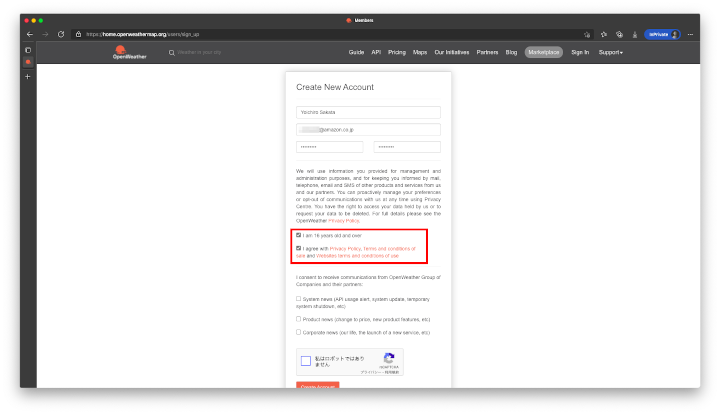
- アカウント情報を入力します。中段の二つのチェックボックスにチェックして、”Create Account” ボタンを押します。
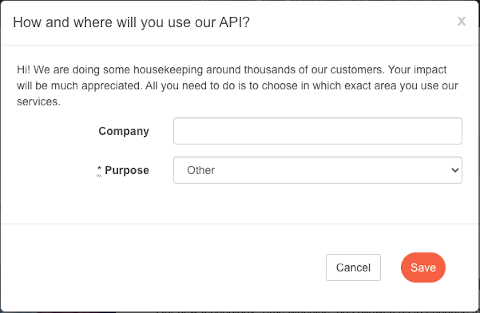
 以下は適当に入力して “Save” ボタンを押します。
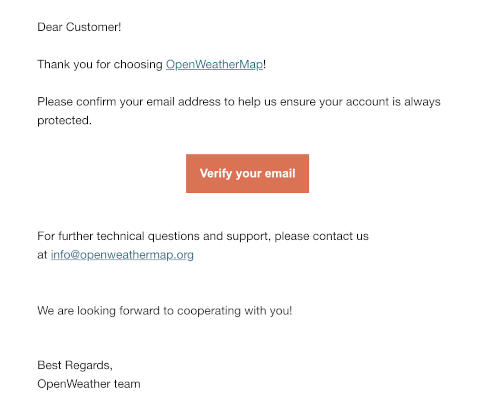
- 確認メールが届くので、”Verify your email” を押して、OpenWeatherにサインインします。
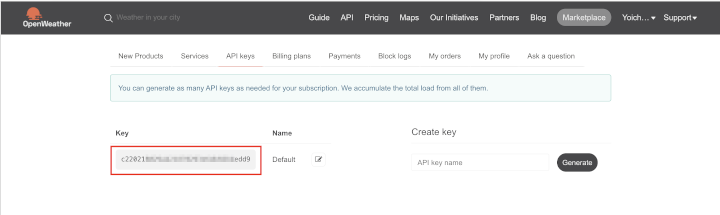
- 右上の自分の名前をクリックし、”My API Keys” を選択します。発行された API キーをメモしておきます。
2. Lambda 関数用の IAM ロール を作成する
IAM ロールの作成
- IAMのコンソールで、左側のナビゲーションペインの”ロール”を選択し、右上の上にある”ロールの作成”ボタンを押します。
- “ユースケースの選択”で Lambda を選択して、”次のステップ:アクセス権”ボタンを押します。
- 管理ポリシー
AWSLambdaBasicExecutionRoleを検索し、チェックを入れます。”次のステップ:タグ”を押します。 - “次のステップ:確認”ボタンを押します。
- ロール名に
Role_Lambda_CWと入力して、”ロールの作成”ボタンを押します。
3. 郵便番号を元に、OpenWeatherMapから気象情報を取得する Lambda 関数を作成する
- AWS マネジメントコンソールで Lambda を選択し、”関数の作成”ボタンを押します。
- “一から作成”をチェックし、関数名に
getWeatherInfoFunctionと入力します。ランタイムは Python 3.7 を選択します。さらに、 デフォルトの実行ロールの変更 メニューを展開し、上で作成した Role_Lambda_CW ロールを選択します。最後に、右下の”関数の作成”ボタンを押します。2021年10月時点で AWS Lambda がサポートする Python ランタイムの最新バージョンは3.9ですが、このハンズオンで使用するサンプルコードでは
botocore.vendored.requestsを使用するので、Python 3.7 を選択します。 lambda_function.py のコードを以下のものに置き換え、”Deploy”ボタンを押します。
from botocore.vendored import requests
import json
import os

def lambda_handler(event, context):
    print(event)
    details = event["Details"]
    parameters = details["Parameters"]
    zipcode = parameters["zipcode"]
    #At this point, you are doing some basic validation to ensure that the zip code is in right format
    if str.isdigit(zipcode) and len(zipcode)==7:
        pass
    else:
        return{
            'Success':'False'
            }

    #At this point, you are making a GET request to the REST endpoint
    url = 'http://api.openweathermap.org/data/2.5/weather'
    APPID = os.environ["APPID"]
    parameters = {
        "zip":zipcode[:3] + "-" + zipcode[3:] + ",jp",
        "APPID":APPID,
        "units":"metric"
    }
    print(parameters)

    try:
        resp = requests.get(url,params=parameters)

        if resp.status_code != 200:
            # This means something went wrong.
            print("there is an error")

            return{
                'Success':'False1'
                }
        else:

            response=json.loads(resp.text)
            weather=response['weather'][0]['description']
            temperature=response['main']['temp']
            place=response['name']
            wind=response['wind']['speed']
            msg = json.loads(resp.text)
            print(msg)

            return{
                'Success':'True',
                'weather':weather,
                'temperature':temperature,
                'place':place,
                'wind':wind
            }
    except:
      return{
                'Success':'False2'
                }
環境変数に
APPIDと 先ほどメモした OpenWeather API キーを入力します。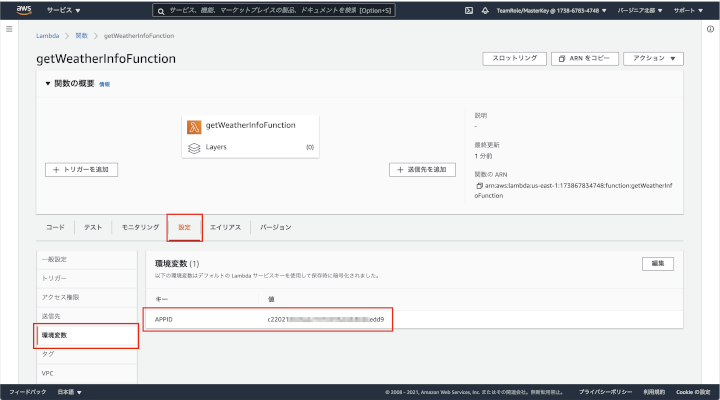
“Test”ボタンの右の ▼ を押して、”Configure test event”を選択します。イベント名に
amazonConnectTestEventと入力し、イベントのペイロードを以下のものに置き換えて、右下の”作成”ボタンを押します。{ "Details": { "ContactData": { "Attributes": {}, "Channel": "VOICE", "ContactId": "4a573372-1f28-4e26-b97b-XXXXXXXXXXX", "CustomerEndpoint": { "Address": "+1234567890", "Type": "TELEPHONE_NUMBER" }, "InitialContactId": "4a573372-1f28-4e26-b97b-XXXXXXXXXXX", "InitiationMethod": "INBOUND | OUTBOUND | TRANSFER | CALLBACK", "InstanceARN": "arn:aws:connect:aws-region:1234567890:instance/c8c0e68d-2200-4265-82c0-XXXXXXXXXX", "PreviousContactId": "4a573372-1f28-4e26-b97b-XXXXXXXXXX", "Queue": "QueueName", "SystemEndpoint": { "Address": "+1234567890", "Type": "TELEPHONE_NUMBER" } }, "Parameters": { "zipcode": "1000001" } }, "Name": "ContactFlowEvent" }“Test” ボタンを押してテストを実行し、以下のような Response が返されることを確認してください。
Response
{
  "Success": "True",
  "weather": "scattered clouds",
  "temperature": 22.25,
  "place": "Chiyoda",
  "wind": 0.45
}
4. Amazon Connect インスタンスに作成したLambda関数を登録する
- AWS マネジメントコンソールで Amazon Connect を選択し、作成したインスタンスのエイリアスをクリックします。
- 左側のナビゲーションペインで問い合わせフローを選択し、”AWS Lambda” の項目で先ほど作成した getWeatherInfoFunction を選んで Add Lambda Function をクリックします。
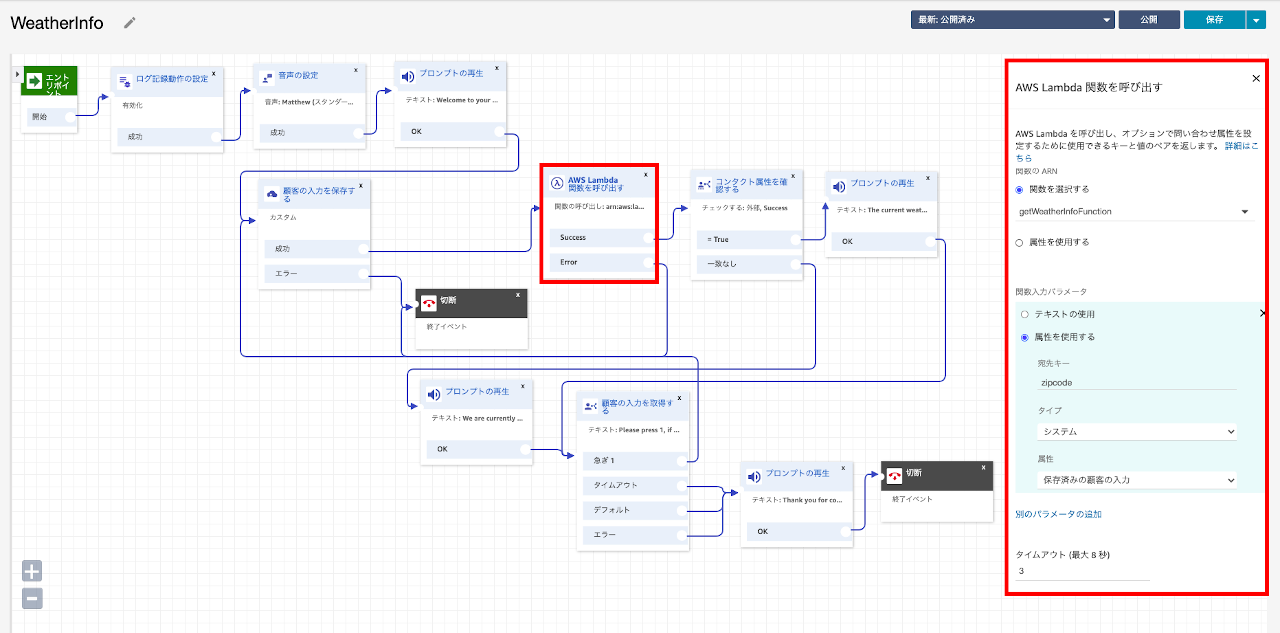
5. Amazon Connect の問い合わせフローを作成し、電話番号を紐づける
まず、以下のサンプルフローをダウンロードします。
続いて、以下の手順で問い合わせフローを作成し、電話番号を紐づけます。 ハンズオン #2は以上となります。お疲れ様でした!
6. テストコール
1000001と入力すると千代田区の現在の気象情報が得られます。