CodeCommit の設定
ここでは、フロントエンドのコードを管理する Git リポジトリを、CodeCommit をリモートリポジトリとして利用して作成します。
作業手順
Git リポジトリの作成と Cloud9 での Git 環境の設定
「サービス」から「開発者用ツール」->「CodeCommit」を選択し、「リポジトリを作成」を選択します。
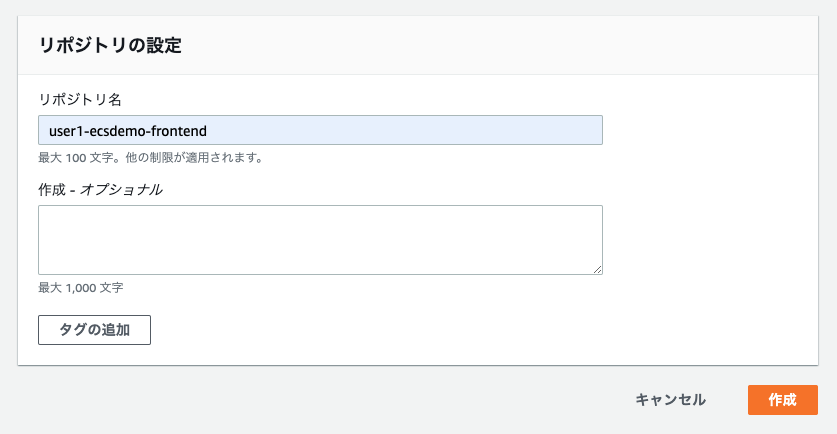
「リポジトリを作成」の画面で、以下のように設定します。その後、「作成」を選択します。
- リポジトリ名:
{ユーザー名}-ecsdemo-frontend
- リポジトリ名:
次に、今回のハンズオンで作成した Cloud9 環境を開き、ターミナルに以下のコマンドを入力します。
- 任意の部分は適宜置き換えてください。
git config --global user.name "{任意の名前}"git config --global user.email "{任意のメールアドレス}"git config --global credential.helper '!aws codecommit credential-helper $@' git config --global credential.UseHttpPath true
Git リポジトリのクローンとアプリケーションコードのダウンロード
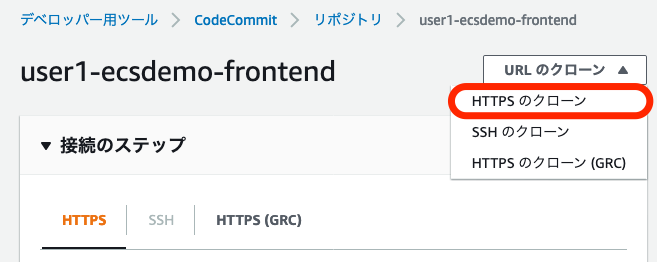
先ほど作成した CodeCommit リポジトリの画面右上にある「URL のクローン」を選択し、「HTTPS のクローン」を選択します。
- これで HTTPS 形式のリポジトリ URL がコピーされます。
コピーしたリポジトリのURLを用いて以下のコマンドを実行します。
cd ~/environmentgit clone {コピーした Git リポジトリの URL}以下は実行例です。
$ cd ~/environment
$ git clone https://git-codecommit.ap-northeast-1.amazonaws.com/v1/repos/user1-ecsdemo-frontend
Cloning into 'user1-ecsdemo-frontend'...
warning: You appear to have cloned an empty repository.
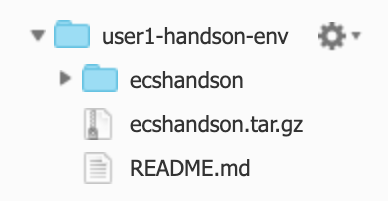
次に、以下のコマンドでアプリケーションコードをダウンロードし、解凍します。ソースコードがダウンロードできていることを確認します。
cd ~/environmentwget {このハンズオンのURL}/codes/ecshandson.tar.gztar --warning=no-unknown-keyword -xzf ecshandson.tar.gz
CI/CD のための準備
ここでは、クローンしたリポジトリに、ダウンロードしたファイルをコピーしながら、CI/CD のための準備をします。
まず、ディレクトリを移動します。
cd ~/environment/ecshandson/ecsdemo-frontend/次に、ファイルをコピーします。
USER_NAME={ユーザー名}cp -pr ./* ~/environment/${USER_NAME}-ecsdemo-frontend/ cp -pr .dockerignore ~/environment/${USER_NAME}-ecsdemo-frontend/ cp -pr .gitignore ~/environment/${USER_NAME}-ecsdemo-frontend/Cloud9 環境の左側、ディレクトリツリーから
{ユーザー名}-ecsdemo-frontendを開き、不要なbuildspec-dockerhub.ymlとbuildspec-test.ymlを削除します。- ファイルを右クリックし、「Delete」を選択すると削除できます。
以下のように
buildspec.ymlを修正します。
REPOSITORY_URIに、先ほど作成したご自身のフロントエンドサービス用の ECR リポジトリの URI を指定します。本モジュールの最後、「まとめと次のステップ」で
buildspec.ymlの解説をしています。「AWS アカウント ID」については、以下のコマンドで確認してください。
aws sts get-caller-identity --query Account --output text
version: 0.2
phases:
  pre_build:
    commands:
      - aws ecr get-login-password --region ap-northeast-1 | docker login --username AWS --password-stdin <AWS アカウント ID>.dkr.ecr.ap-northeast-1.amazonaws.com
      - REPOSITORY_URI=<先ほど作成した ECR リポジトリの URI>
      - IMAGE_TAG=$(echo $CODEBUILD_RESOLVED_SOURCE_VERSION | cut -c 1-7)

  build:
    commands:
      - docker build -t $REPOSITORY_URI:latest .
      - docker tag $REPOSITORY_URI:latest $REPOSITORY_URI:$IMAGE_TAG

  post_build:
    commands:
      - docker push $REPOSITORY_URI:latest
      - docker push $REPOSITORY_URI:$IMAGE_TAG
      - printf '{"Version":"1.0","ImageURI":"%s"}' $REPOSITORY_URI:$IMAGE_TAG > imageDetail.json

artifacts:
files: imageDetail.jsonappspec.ymlを作成します。以下の内容を修正せず、そのままお使いください。
ファイルの作成は、ディレクトリを右クリックし、「New File」を選択すると作成できます。
appspec.ymlファイルは CodeDeploy がデプロイを管理するために使用するファイルです。TASK_DEFINITIONプレースホルダーは、パイプラインが走ると自動的に置き換わります。今回のデプロイ対象は ECS なので、「ECS タスク定義」「ロードバランサー情報」などを含める必要があります。
version: 0.0
Resources:
  - TargetService:
      Type: AWS::ECS::Service
      Properties:
        TaskDefinition: "<TASK_DEFINITION>"
        LoadBalancerInfo:
            ContainerName: "ecsdemo-frontend"
ContainerPort: "3000"taskdef.jsonを、appspec.ymlと同じディレクトリ階層に作成します。こちらは「サービス」から「コンテナ」->「Elastic Container Service」を選択し、「タスク定義」、「{ユーザー名}-ecsdemo-frontend」、「{ユーザー名}-ecsdemo-frontend:1」、「JSON」と順に選択すると表示される内容をコピーして、利用します。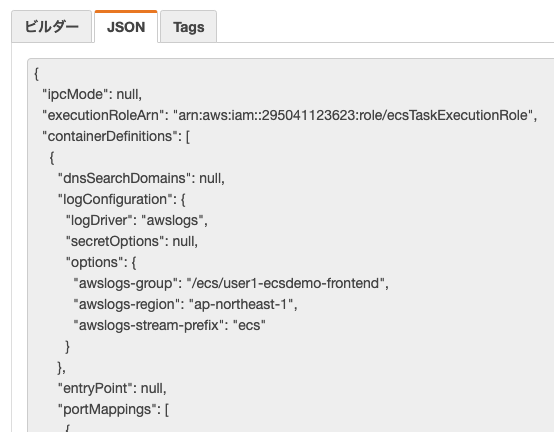
先ほどコピーして作成した
taskdef.jsonを以下のように修正します。taskdef.jsonは Fargate で起動されるタスクの情報が記載されたファイルです。今回はパイプラインがトリガーされると動的にタスク定義を更新します。
imageを<IMAGE1_NAME>に変更します。このプレースホルダーは「Build」アクション後に動的にアップデートされます。
{
    "memoryReservation": 128,
    "volumesFrom": [],
    "stopTimeout": null,
    "image": "<IMAGE1_NAME>",
    "startTimeout": null,
    "dependsOn": null,
    "disableNetworking": null,
    "interactive": null,
    "healthCheck": null
}
最後に、これらの変更を以下のコマンドでリモートリポジトリへプッシュします。
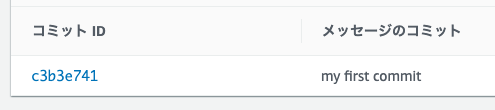
cd ~/environment/${USER_NAME}-ecsdemo-frontend/
git add -A
git commit -m "my first commit"
git push origin master
以下は実行例です。
Admin:~/environment/user1-ecsdemo-frontend (master) $ git push origin master
Counting objects: 135, done.
Delta compression using up to 2 threads.
Compressing objects: 100% (130/130), done.
Writing objects: 100% (135/135), 48.51 KiB | 2.42 MiB/s, done.
Total 135 (delta 51), reused 0 (delta 0)
To https://git-codecommit.ap-northeast-1.amazonaws.com/v1/repos/user1-ecsdemo-frontend
* [new branch]      master -> master
実装の確認
- CodeCommit コンソールの「コミット」から、コミット履歴が見えることを確認します。